


Broilmaster
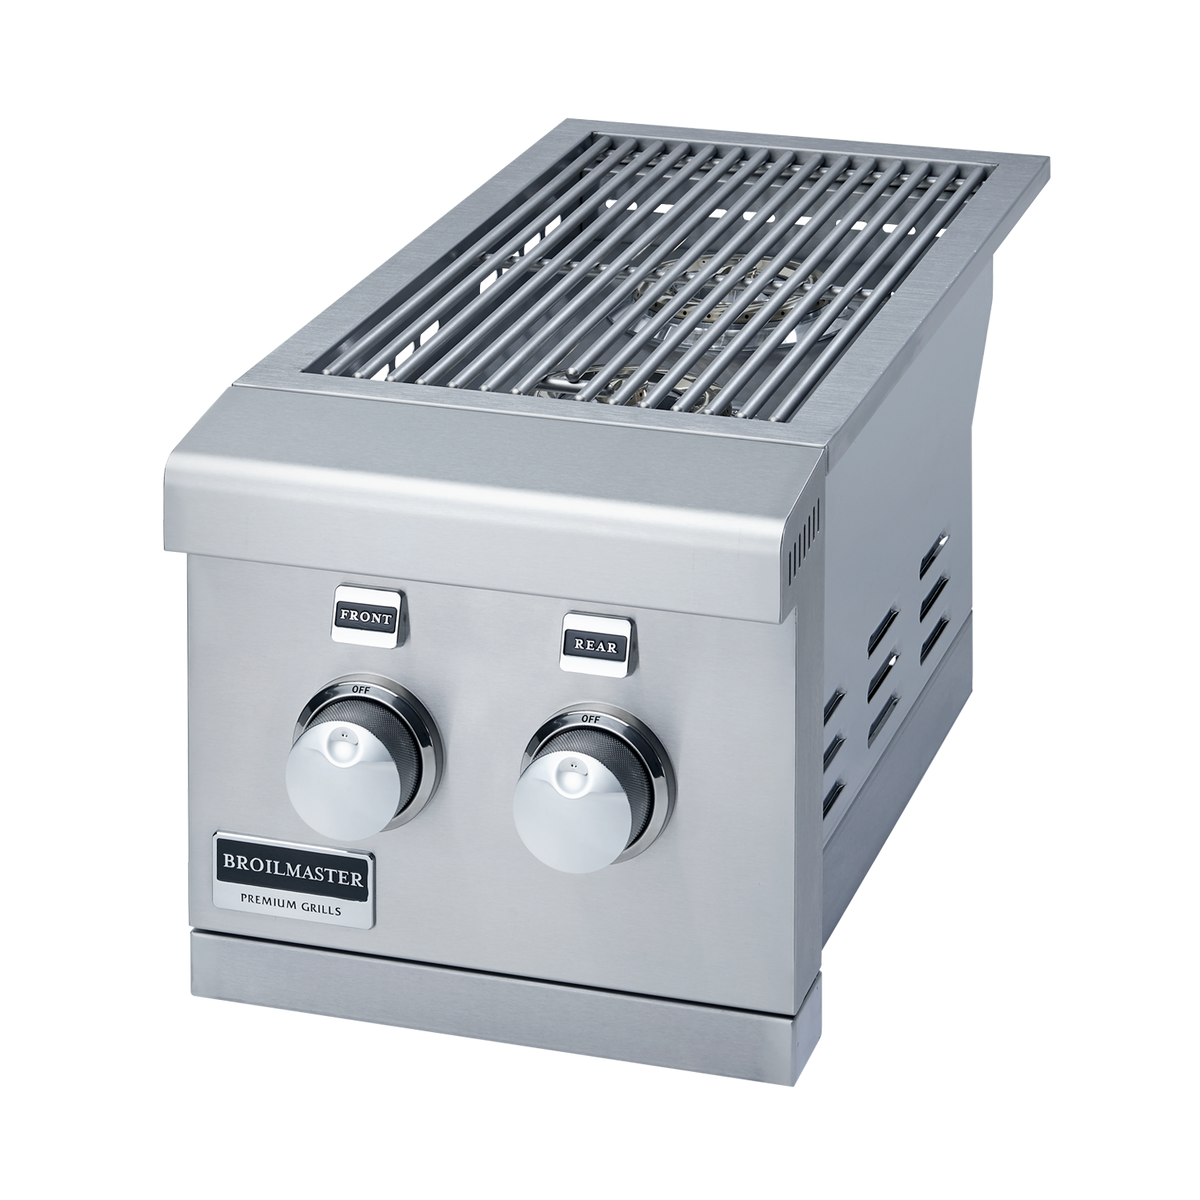
Broilmaster 12-Inch Double Side Burner - BSABF12N
Broilmaster 12-Inch Double Side Burner - BSABF12N
Couldn't load pickup availability
Order before noon Pacific Time for same-day shipping.*
Estimated delivery within the contiguous US: 2–3 business days after shipping.
*Monday–Friday, excluding holidays.
Shipping details
Orders placed before 12:00 p.m. Pacific Time Monday–Friday ship the same day, excluding holidays. Orders placed after the cutoff, on weekends, or on holidays ship the next business day.
Delivery within the contiguous US typically takes 2–3 business days after shipping. Saturdays, Sundays, and holidays do not count toward this estimate.
Orders with a subtotal over $199.99 before tax qualify for free base shipping to US destinations. Orders with a subtotal of $199.99 or less before tax have a $29.99 base shipping charge per order.
Additional shipping charges may apply to Alaska, Hawaii, and US territories. We will notify you of any additional charge on a case-by-case basis before shipping. See our shipping policy for details and delivery estimates for these destinations.
Ask an Expert
Buy with confidence. Talk to a grill expert today.
- Call 844-MNK-GRILLS (844) 655-4745
- Text (949) 484-9112
- Live chat
Hours
Sales & Support Hours (Pacific)
- Sales
- Mon–Fri 7am–9pm · Sat 8:30am–5pm · Sun 9:30am–6pm
- Support
- Mon–Fri 8am–5pm · Sat 8:30am–5pm · Sun 9:30am–6pm
Description
The Broilmaster 12-Inch Double Side Burner (BSABF12N) is a slide-in side burner with front controls that turns a section of an outdoor kitchen island into a two-burner stovetop. Each burner has its own knob, and together they give up to 24,000 BTU, so you can simmer a sauce on one and cook a side dish on the other while the main course is on the grill.
This model ships set up for natural gas, with a propane conversion orifice kit packed in the box; Broilmaster asks that a professional plumber or gas technician carry out the conversion. Broilmaster lists the burner with the G-Series Elite 26 (BSG262N), Elite 34 (BSG343N) and Elite 42 (BSG424N) built-in grills, and the B-Series manual lists it as an accessory for the BSB324 and BSB405.
Plan ahead: the burner is built in only. In an island built of combustible material, the 12" insulated sleeve (BSASL12) must go in first. Broilmaster's specification sheets give the burner as 11-7/8" W x 11-3/4" H x 21" D and the sleeve as 13-3/8" W x 12-7/8" H x 22-1/8" D.

Features
- Two burners, two knobs: each burner is controlled on its own, like a cooktop.
- Up to 24,000 BTU combined: enough output for pots and pans next to the grill.
- Slide-in with front controls: the burner rests on the sleeve lip with no fasteners, so it lifts out for service.
- Natural gas or propane: ships for natural gas with the propane conversion orifices included.
- Matching insulated sleeve: the BSASL12 sleeve lets the burner go into an island built of combustible material.
- Lifetime rust-through coverage: side burners and their housings are on Broilmaster's limited lifetime list.
Specifications
| Brand | Broilmaster |
|---|---|
| Product line | Stainless steel grill accessories, side burners |
| Model | BSABF12N (natural gas, field-convertible to propane) |
| Type | 12-inch double side burner, slide-in with front controls, built-in |
| Burners | 2, each with its own control knob |
| Output | Up to 24,000 BTU combined (both burners) |
| Ignition | Push-and-turn knob ignition (a click lights the burner) |
| Fuel | Natural gas as shipped; propane conversion orifice kit included |
| Gas supply pressure | Natural gas 4" water column; propane 11" water column |
| Built-in dimensions (W x H x D) | 11-7/8" x 11-3/4" x 21" (spec sheets 01031 and 010119) |
| Insulated sleeve (sold separately) | BSASL12, 13-3/8" W x 12-7/8" H x 22-1/8" D |
| Installation | Built-in only; non-combustible enclosure, or the insulated sleeve in combustible construction |
| Built-in gas connection | Stainless steel flex line or 12 ft hose recommended for natural gas |
| Compatible grills | G-Series Elite 26, 34 and 42 built-in (BSG262, BSG343, BSG424); listed as a B-Series accessory for BSB324, BSB324MG and BSB405 |
| Construction | Stainless steel |
| Warranty | Limited lifetime against rust-through on side burners and housings; 1 year on valves, knobs, ignitors, hoses and fittings |
What's included
- 12" double side burner (BSABF12N)
- Propane conversion orifice kit
Sold separately
- 12" insulated sleeve (BSASL12): required for installation in combustible construction
- G-Series Elite 26 built-in grill (BSG262N)
- G-Series Elite 34 built-in grill (BSG343N)
- G-Series Elite 42 built-in grill (BSG424N)
- 16" two-ring power burner (BSABW16N): up to 60,000 BTU
- 12" single side burner (BSAF12DN): drop-in with top controls
- 18" roll-out waste drawer (BSAW1826R)
- 20" slide-out propane tank drawer (BSAW2022)
Installation planning
- Enclosure: surround the burner with non-combustible material, and in combustible construction install the insulated sleeve (BSASL12) first. Installing into a combustible enclosure without the insulated jacket can cause a fire.
- Clearances printed in the manual: 36" from the sides and 36" from the back to adjacent combustible construction below the top of the unit; at least 16" from any wall or surface and from combustible objects; at least 6" behind any hood so it can open.
- Framing: build it level front to back and side to side, cut 4" square openings for the gas and electrical connections at the rear or bottom, and let nothing combustible stand above the top surface or in front of the liner face.
- Setting the burner: it rests on the sleeve lip without fasteners. Do not grout the sides or fasten it in, so it can be removed for maintenance; a non-combustible sealant may fill any gap. Never run the gas hose between the burner and the sleeve.
- Gas: install an accessible shut-off valve on the supply. Broilmaster recommends a stainless steel flex line or a 12 ft hose from the burner to a natural gas supply. Size the supply line for every appliance on it: the manual's table for 3/4" pipe allows 360,000 BTU in total at 10 ft, 245,000 at 20 ft and 115,000 at 80 ft.
- Propane: a professional fits the conversion orifices (remove the grate and brass burner covers, unplug the ignition wires, change the orifices in the venturi tubes, then reassemble). With a propane tank in the island, add vent registers of at least 10 sq. in. each, two per side, one high and one low, with the bottom of each vent at least 2-1/4" above the ground. Hand-tighten the tank connection.
- Leak test: mix one part liquid detergent with one part water, turn all knobs off, turn the gas on and brush the solution on every connection; bubbles mean a leak to tighten or repair. Test before first use, at the start of each season and whenever the tank is changed. Never use a flame.
- Outdoor use only: never under overhead combustible construction, never in a garage, porch, shed, breezeway or other enclosed area, and never on a balcony, deck or patio above ground level.
- To light: push the knob in, turn it a quarter turn and hold a few seconds, then turn left; you should hear a click as the burner lights. If it does not light, turn it off, wait 5 minutes and try again, or hold a long-reach lighter over the burner ports. In cold weather, if you hear a whoosh, turn the knob off and relight.
- Low flame: with the burner lit on LOW, pull off the knob, hold the valve shaft with pliers and turn the adjusting screw with a thin flat-blade screwdriver to the smallest stable flame.
Care: Turn the burner off and let it cool before cleaning. Wash the grates with mild soap and warm water before first use and from time to time, and check and clean the grease tray before each use. Inspect and clean the burner venturi tubes at least twice a year and whenever spiders are active or the burner has not been used for a while, with a wire hook, bottle brush or forced air. Wipe the stainless steel with a soapy cloth and rinse, remove food residue promptly, polish with the grain, and avoid abrasives, steel wool and chlorine cleaners.
Warranty
Broilmaster's stainless steel specification sheets list side burners and side burner housings among the components with a limited lifetime warranty against rust-through; valves, knobs, ignitors, labels, hoses, fittings and other parts have a limited 1-year warranty. The warranty printed in the side burner manual covers the original purchaser only, requires installation by a qualified installer and proof of purchase, and excludes damage from misuse, improper installation or storage and lack of maintenance, unauthorized service, removal and reinstallation, and travel, diagnostic, freight, service-call and labor costs; claims go through the installing dealer. That printed warranty names the G-Series grill models, so contact us to confirm the burner's terms before you order.
Manuals and documents
- Broilmaster stainless side burner manual for BSABW16, BSABF12 and BSAF12D (PDF): installation, lighting, conversion, care and warranty
- Broilmaster stainless grill specification sheet, 01031 (PDF): burner and sleeve dimensions, warranty summary
- Broilmaster B-Series specification sheet, 010119 (PDF)
- Broilmaster B-Series grill manual, BR0387 (PDF): accessory list
- Broilmaster Double Side Burner BSABF12 product page
Legal disclaimers and warnings
Product packaging, owners' manuals, installation instructions, and/or operating instructions may include more information than what is shown on our website. The content on our site is intended to be used for reference purposes only. Please fully read all included manuals and documentation before installing or using this product. WARNING for California residents: fuels used in gas appliances, and the products of combustion of such fuels, contain chemicals known to the State of California to cause cancer, birth defects or other reproductive harm.